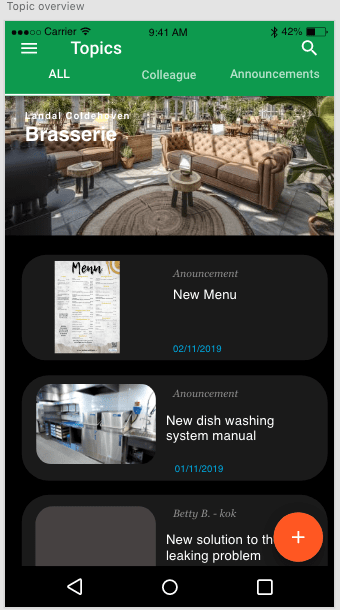
The topic page is the part of the app where all the latest news and updates on certain issues and discoveries can be posted within the company. The two pictures below show a first idea on how to bring this topics page to life.
In the design, the topics are placed in the lower part of the homepage, as can be seen in the picture below.
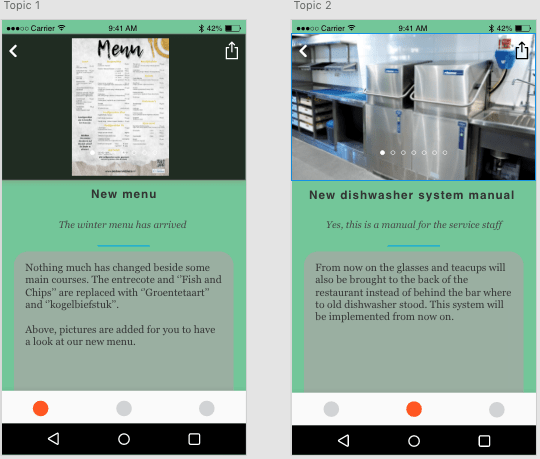
The topics can be displayed as shown below.
Attempt 1
In my first attempt I mainly used a method where you visually can see topics that are added but you can’t add them yourself. The layout is based out of a Facebook layout. The video below shows how the first attempt looked like.
The page looks nice but there is much you can do. I would like to have it that the user not only can see the topics but also add one. The youtube video and the link to the Github code that I used as a basis are shown down below.
In the second attempt I followed one youtube channel in specific. He showed me how to use firebase to make topics and how to save, display and delete them. This I wrote together with his example. This was very nice because I could copy every move and with that. Learn from it. To learn every step was very time consuming. In the video below you can see how I shaped the topic page so far.
I learned how to work with Vuex and how to implement timer and date components (Android). Vuex does store information, but when the page is re-loaded, the stored information is erased. The link for the Youtube channel I watched and learned from:
Time spend on topic page
Attempt 1: 4 hours
Watching half the youtube tutorial playlist: 5 hours
Implementing the newly learned knowledge into the code: 5 hours
Making this blog post (including Youtube video’s and links): 1 hour
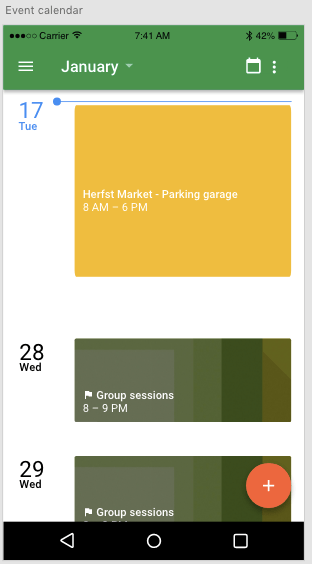
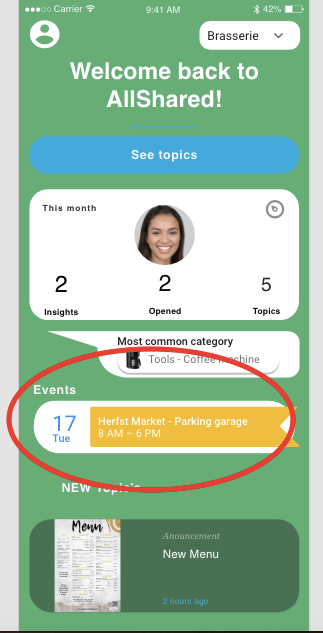
In this part of the project I am going to tell you how I managed to get a working agenda in the app. In the picture below you can see a standard layout of what I imagent such a event calendar will look like. This layout was made with adobe XD.
The Event calendar is linked with the home page. In order to fill the home page I am planning to first fill all the other parts of the app. Only then I can deside how the home page is going to look like. The pictures below show a layout of where I imagent the link to the event agenda is going to be.
Attempt 1
I first started to look at the layouts that where already available on the Vuetify site. I implemented the layout into my app with the right navigation I already made. The navigation turned out to be more difficult than expected because it covered some of the other components of the events page. Below you can see the first try of the events page.
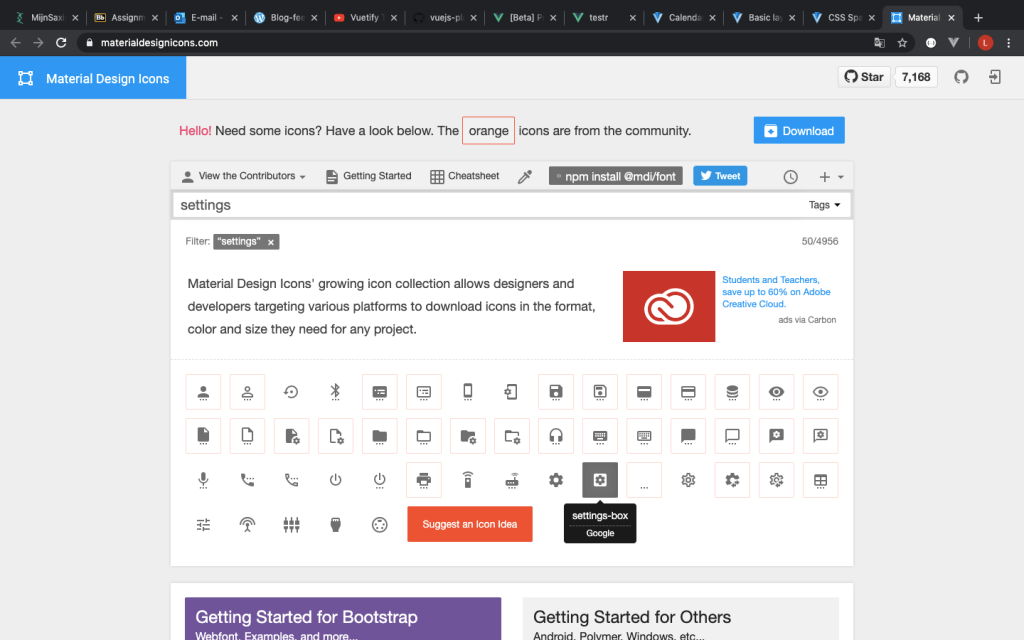
In order to implement some of the agenda/ calendar codes, I needed to find the right aliases and notations. This i did with help of materialdesignicons.com and codepen.io to test and preview some of the code before I implemented it.
Website to find documentation on icons.codepen to preview and test some of the code.
Attempt 2
In the second attempt i used firebase. Firebase remembers the input I give it and gives me the opportunity to save my calendar files for the next time I open it. The Youtube video below helped me understand Firebase and how to install and implement it to my code.
The video below shows the solution I came up with for the calendar that keeps track of the events. In the ideal situation a normal user can add events and work appointments for himself while a admin from the company can add events that are interesting for the whole company. I failed to add this functionality to the app, but I still could give the app a personal event calendar.
Reflection
This time I did invest a lot of time in the setup of the step. Firebase itself is from Google and is very user friendly, this helped me a lot to get trough the installation steps. After the installation of Firebase.
I still struggle a lot with the navigation bar. This cost me a lot of time. If I simple managed to correct the navigation bar in the first place i didn’t need to dive into the knowledge of navigation again.
Time spent on Event calendar:
Attempt one (mainly javascript): 5 hours
Watching the Youtube video (multiple times): 2 hours
Setting up Firebase: 3 hours
Implementing the code into mine: 6 hours
Making Youtube videos and delivering other content to this post: 1 hour
In week 6&7 we got some feedback on our our ideas for our product video introduction and were introduced with a video editing tool. There is no blogpost of week 5 because this week there wasn’t a lecture.
The editing tool we where made familiar with is Adobe Premiere. For some reason I could install the free week trail version so I edited my video with HitFilm Express. HitFilm works in a familiar way as Adobe Premiere, so I still watched the introduction video that was handed to us by the lecturer. The video is displayed below.
The video also helped my with some small but helpful tips while editing (not a guarantee that I will remember everything).
After shooting the first videos for my product introduction video, I started working with HitFilm. I edited the videos together and downloaded some music from freeplaymusic.com. These songs where used as background music. In total I used two different songs to change the ambiance of the two parts of the clip. Afterwards I recorded some sounds that I used for explaining what happened in the video and what the purpose of my app is. To learn how to add certain things into my video I watched two other Youtube videos. This time specific to learn how to use HitFilm.
In this week we where trying out a professional video camera. Week 3 is missing here because our teacher was sick at the moment.
We tried the video camera out in the classroom and outside. I, together with two other students, tried making a news report with a microphone we plugged into the camera. We did this to learn how we can use these tools in our own introduction video for our project.
It was nice to know that the video camera together with the microphone are available for just about every school project. Now I know where to lend one for future use.
In order to create a easier coding environment I want to add Vuetify as building tool. This would offer my an easier way of bringing components into my app. The plug of Vuetify didn’t cooperate with my already read code so I had to start over.
When I started my new project I didn’t got the right settings. Icons didn’t work and some of the components didn’t work as intent. Vuetify was update to 2.0 so most of the tutorials didn’t showed me the precise way of doing everything. I started with reading the installation steps written down on the vuetify website (link below).
This code had to be implemented into webpack.config.js
Finding webpack.config.js wasn’t as simple as it sounds. It looked like every Youtuber had the setting which I had to do as default.
Reflection on step 5
I noticed that working in an unfamiliar environment can come with complications and might not be as easy to learn. The default settings might not be your default settings. Missing certain loaders, plug-ins or settings is frustrating. Frustrating, because you do the same as your Youtube instructor but it doesn’t have the same outcome. The Youtubers are helping me, but I have to look carefully if the right settings are in place and if I don’t work within an other programming environment. Reading the introduction again might be necessary in the case of Vuetify, but also the navigation part of this step.
Next time, I would like to try to be more patient and create the right programming environment, before I start programming. Otherwise it will cost me more time in the end.
Time spend on installing end testing Vuetify
Reading the website for instalment and watching Youtube tutorials: 3 hours
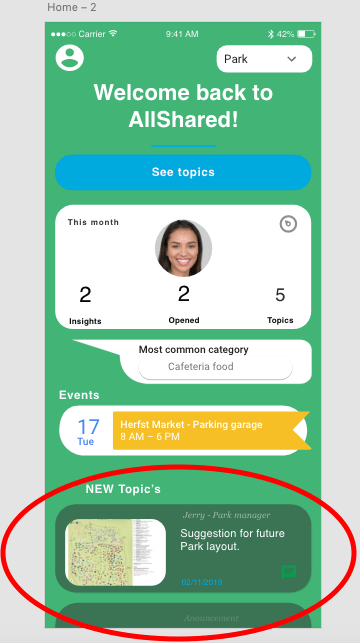
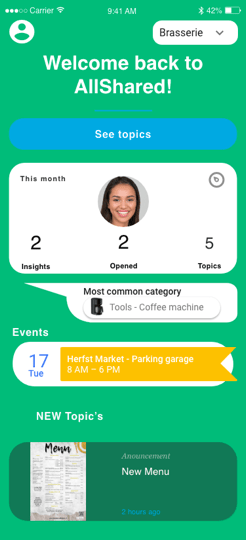
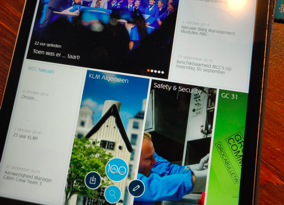
The idea of the homepage can be seen in the picture below. It is meant to mean as a hub where you can access al the functionality of the app. That means making/uploading topics and insights and also accessing your event agenda. You can also switch from employee to supervisor within this home page. This because some employees have a supervisor job but still aren’t the main employer. You can also change the range of topics you want to have displayed be changing if you want to show topics for the whole company or just for your branch/ department.
Designed home screenFirst try home screen on Vue
Navigation system
I started to making of the app with a navigation system. This system will be the main route within the app and is built with help of a router. To learn how to make routes with a router I inquired some Youtube videos and forums. I found it very hard to find the right solution because I want routes to be excessed by clicking on buttons and pictures as well. The Youtubers underneath showed me different solutions but most of them of problems I didn’t even yet know I had to face. To find a simple solution on just having to click on a button which brought me to the next page was harder than I thought.
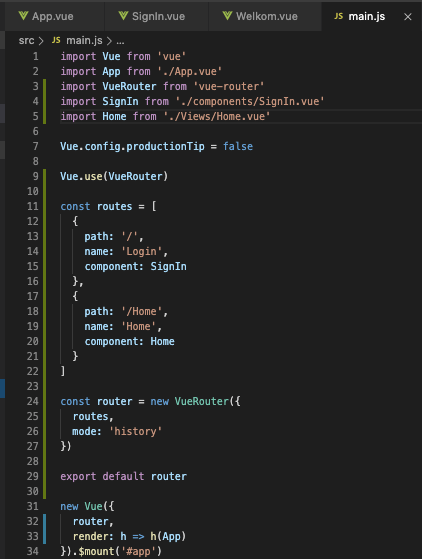
Oke so first up. Installing the router-plugin.
Then adept the router code to my liking.
I merged the js code of the router with my main js code of the app. This because most Youtube tutorials use that layout. It makes it easier to understand.
I watched a lot of Youtube tutorials and tried to merge some already made codes on GitHub but almost all failed to help me. The two underneath gave me the best understanding of how to setup my navigation and used the router option to route with buttons and a menu screen.
As can be seen in the second upper picture of this post. I already tried to make a menu for my app. This is just trying to learn the concept of routing. Eventually i want to use real android menu components (which are already familiar to users) and connect them to my pages. The picture underneath shows the display of my current menu.
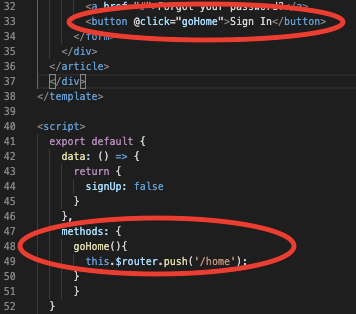
The post below shows you how to connect a button to a route.
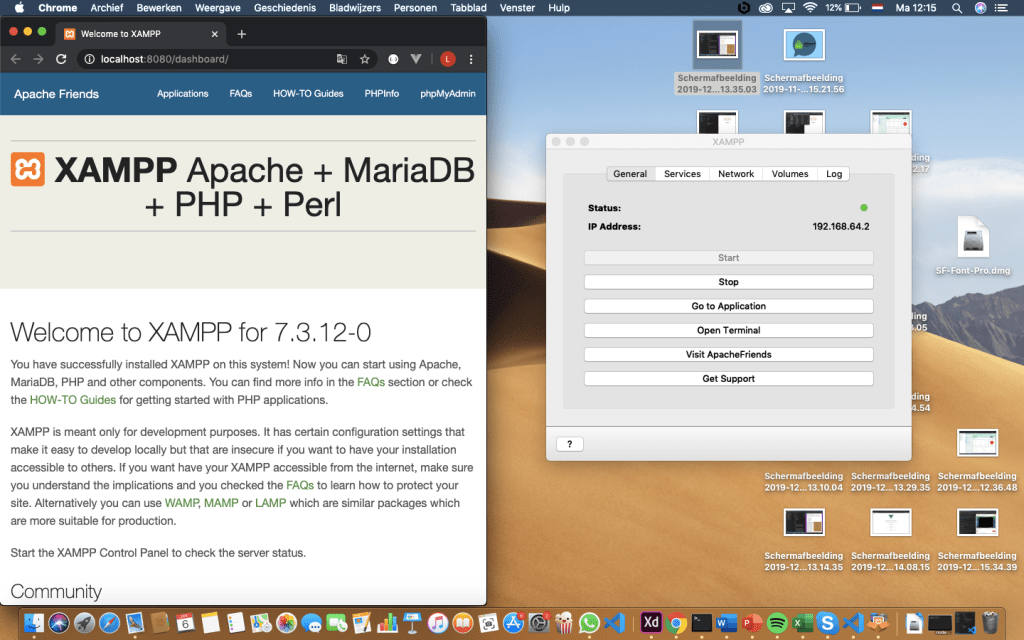
What do I want my login page to do? Just have a visual page which only accepts certain words within the login lines. This is doable by an JavaScript code. Or do I want more than one users to be excepted and that the accounts which are granted access to be altered to my liking (in an easy way). This could be done by MyAdmin. In the paragraph underneath I explain how I tried to understand how XAMPP works and how it could be implemented into my app.
XAMPP
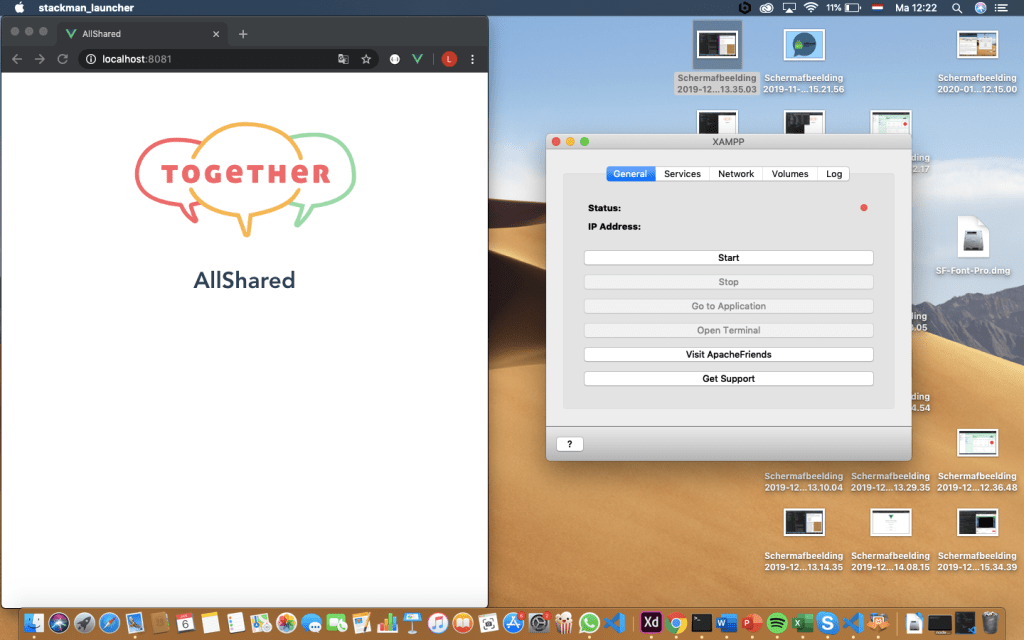
The picture above shows the page when XAMPP is off.
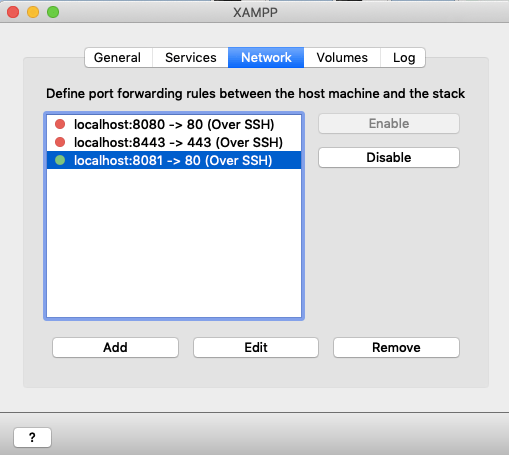
In order to connect XAMPP to my app I enable the localhost:8080. The second time I started the app (via the UI dashboard) it changed its localhost to 8081, but this was easily changed within XAMPP.
The picture above shows the app when XAMPP is on. This page can be altered to make it a login screen to my liking. Now it shows a default page where all the programming steps are explained.
I choose not to use this method because I want a simple page which brings my to the home page after typing in the name or password I want. This can be done by JavaScript.
Login Functionality with JavaScript
Attempt one
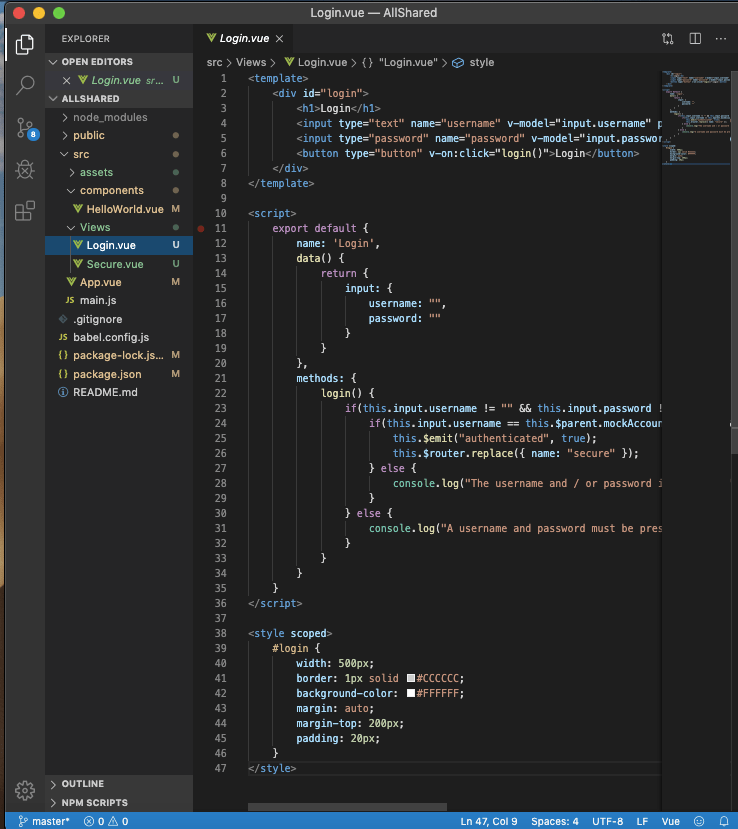
To create the login page I want I inquired an article. The link to the article can be found below.
The article explains how he setup a simple login page from one page to the next one. The publisher also used VUE. The code he made is shown and he explains every step. Because of the HTML and CSS knowledge I acquired in the last step I know where to put the different codes in order to make it work in my app.
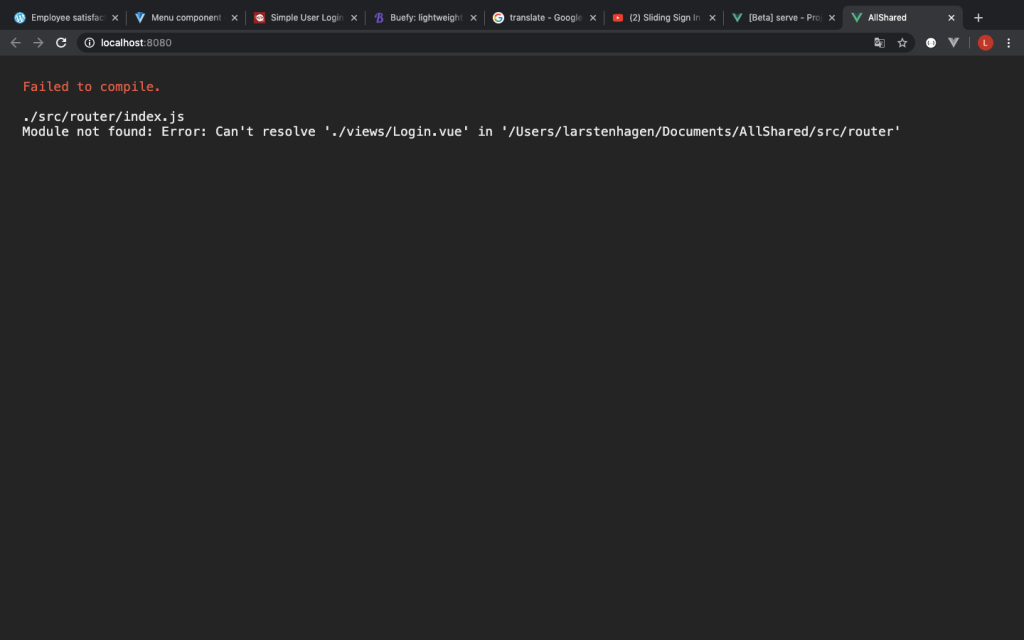
Eventually it didn’t worked. I put a router into the app with help of the Vue CLI and but I got the massage underneath. So I came to realise I had to find a simpler way.
Attempt two
Since the first article didn’t helped me create the login page I turned to Youtube. The Youtuber showed me some javascript coding with combined with CSS styling. I understand the JavaScript, but I still find it hard to understand CSS. The link underneath will bring you to the youtube video.
To create the login page the Youtuber descripes I needed to install Sass within my Vue Project. For this I inquired the youtube video below.
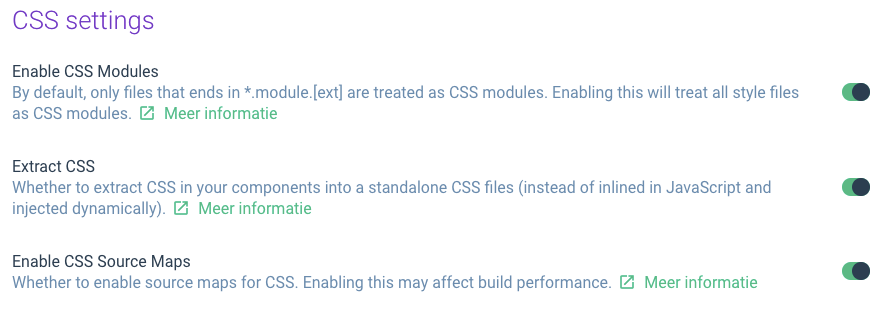
To create the right settings I needed to changes certain things after the instalment, otherwise it didn’t accept the sass styling that was used. The settings are displayed below.
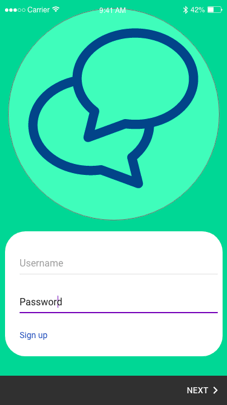
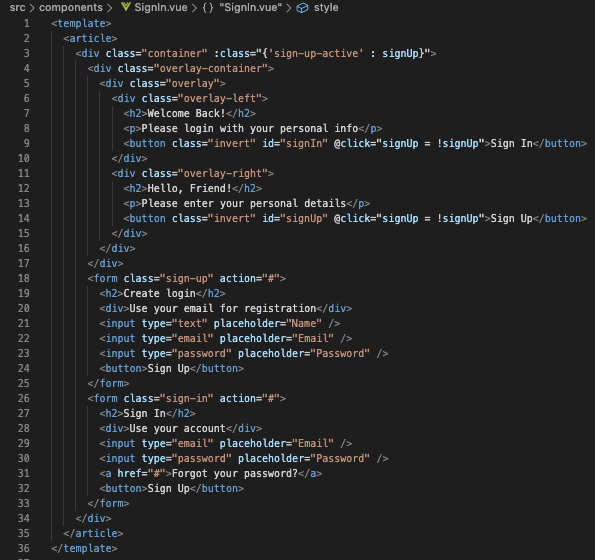
The end result is displayed below.
When the Sign In button is pressed it will bring the user to the home page. In order to connect the page to the next page I tried out a multiple page approach and a single page approach. Eventually I chose for a single page approach with help of a Vue router. This could be aded as a plugin within the Vue CLI. More research information about the router option and navigation from the home page can be found in the next post.
Time spend
XAMPP downloading, setting up and practising : 6 hours
Javascript attempt one: 3 hours
Javascript attempt two: 5 hours
Connecting the login page with the next page: 2 hour
For the making of the app, I am going to use some pre-made android app layouts from sites as Bulma, Vuetify and Buefy. In order to understand most of the code that is going to be used within Vue, I decided to first try and learn the basics of HTML. This knowledge will help me to change the available code to my liking.
The link below will bring you to the LinkInLearning webpage of the HTML course I followed. I watched all the videos and did the practise exams. When I look back on what I learn during the course. I could say that not all features where that important for the building of my app. The course went in on carefully structuring all the content of the codes, I found that to be less important than the all the visual aspects of HTML.
During the course I also learned to understand the connection of CSS and JavaScript to HTML. I did have some experience with JavaScript but not with CSS. It was nice to learn how the three of them work together.
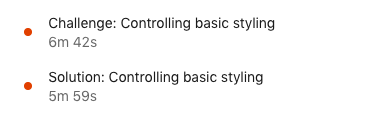
During the course it wasn’t only listening. There were some challenge exams to test my skills. This was a very nice way to test how much I really remembered after the lessons. For every exam there is a video were the teacher explains what to do and in the next video and he carefully explains what he did to solve the exam.
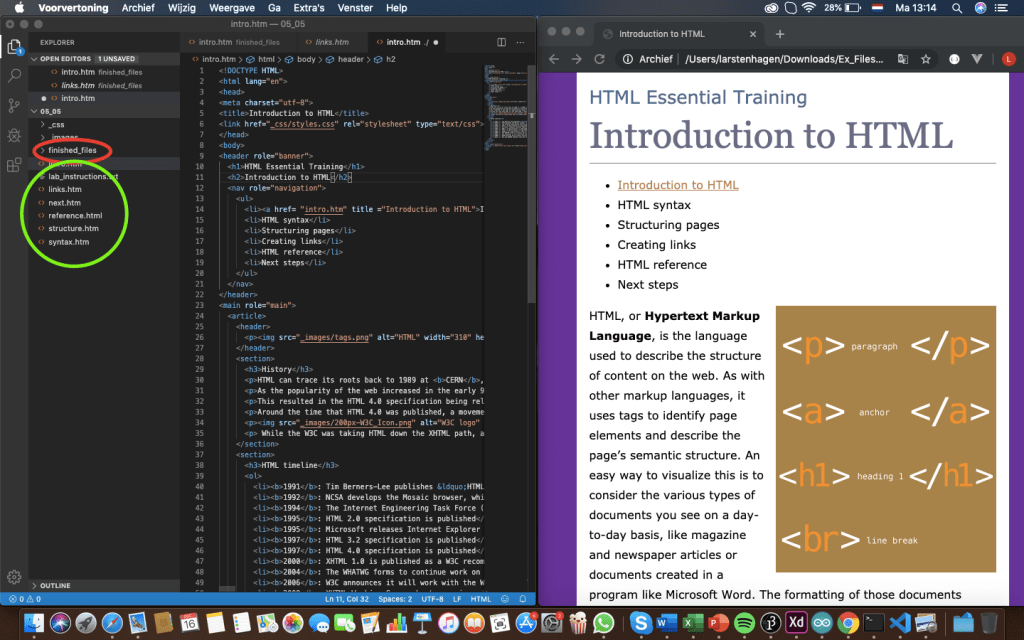
The picture below shows the way I made the challenges. At first I didn’t know how to show my site in the browser, so I made the practising code (green) and compared it with the finished files (red). The screen on the right side didn’t update, every time I want to see my progress in the web browser, I needed to reopen the file.
For my own app I choose a starting picture and write some text to test what i learned. I watched the same tutorial as before for Vue to see how much I understand now in comparison with before I did the tutorial. I now understand how the layout is made and I can read some most of the code. I find it still hard to write it myself, but since I am going to use pre-made android software this should be doable.
For my app I mainly put different HTML and javaScript codes into my app. At the end of the learning course I experienced that I could better understand why I need to put a certain code at a certain place.
Time spend on HTML
Watching the video tutorials from LinkedInLearning (Linda): 6 hours
Making practise files from the LinkedInLearning course: 6 hours
In this part of the project I show information gathered beforehand. Survey’s and interviews gave me different insights to the problem. I explain why I use different methods and what I got out of the methods.
Information gathered from survey’s
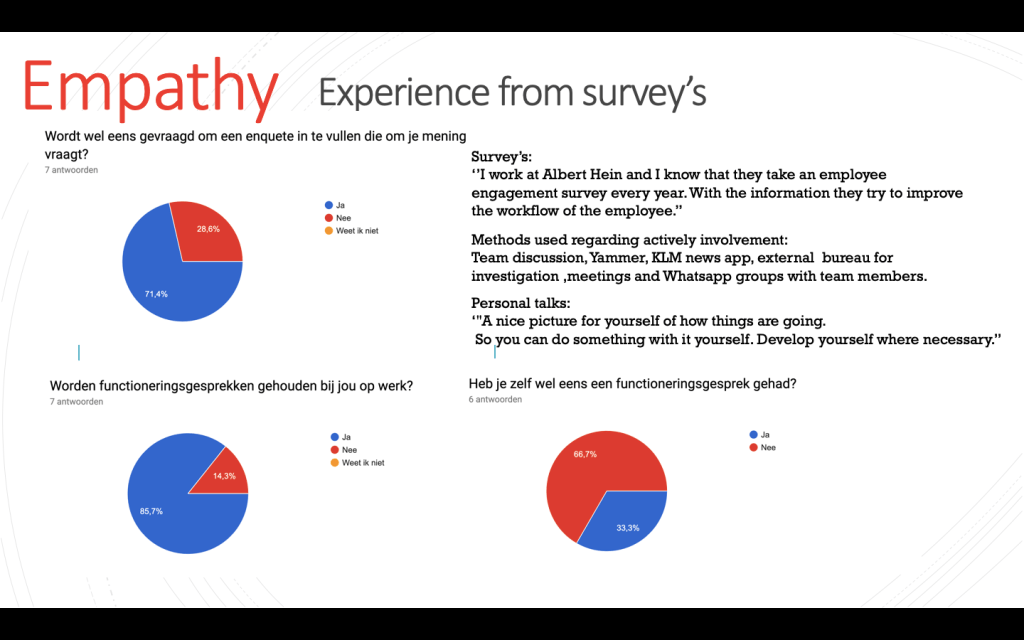
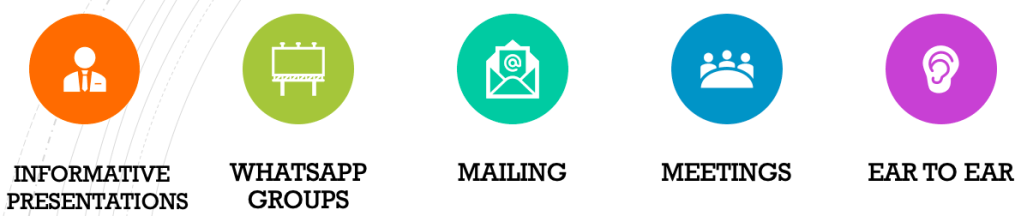
Survey’s were a quick and easy tool to receive small answers from different sources. Quantitively speaking it was efficient. I discovered that personal talks are only common under employees with a permanent contract. And employees that don’t have a permanent contract mostly have to rely on employee satisfaction survey’s or other methods. By asking what alternative methods where used to ensure the employee satisfaction, I got a quick overview of the existing methods. That is how i got to the top five alternatives down below.
Interviews
I did two interviews. One with my F&B manager at the restaurant of Landal Coldehoven (employer). The other with my mother, a stewardess at KLM (employee).
Information gathered from an employer
Which methods are used for gathering information from employees? Ideas from employees can be passed on to the Food and Business manager by email, on Whatsapp(group) or in person (if passed on, mostly in person).
How are employees informed on upcoming topics? Judgment from employees, most of the time, takes place after new changes have already be made or settled on. Employees on the park only get a informative presentation twice a year (if you are present). This presentation is concluding the statistics of the present year in comparison with the year before. Other information goes ear to ear.
How does implementing a new idea work at Landal Coldehoven? The headquarters of Landal implements ‘’improvements’’ and Landal Coldehoven works as a pilot for the other parks. The ideas come mainly from the headquarters but the F&B manager can make suggestions to the park manager. The F&B manager doesn’t exactly know where the new ideas are based on.
Why isn’t Landal gathering more information from employees? The F&B manager says she gladly excepts any kind of tools useful to gather information. There hasn’t been much experimented with the gathering of information besides the existing tools. Maybe a well-arranged overview, which doesn’t take to much of her time, but still gives a good overlook on the employee work satisfaction. More time means more money has to be invested.
Information gathered from an employee
What current methods are used to gather useful information from you? Like experienced issues on the work floor. KLM works with different apps. These apps serve different functions. The interesting apps for work-related feedback within KLM is the news the Yammer app. The Yammer app lets employees give feedback on the given topics or just about whatever they want. It works as a social hub within the company and creates a way of a communication between every person within the company. It doesn’t matter what your function is. You can post topics and comment on them. Besides the app, there is also a person available via mail, who can be reached in case of any personal issues.
How are you kept up-to-date with the newest changes within the company? The news app keeps employees within the company up to date with the latest changes. For example: experienced issues, new solutions, events and future plans.
Do you feel actively involved within the company? Sometimes yes, sometimes no. It is a big company so she gets if not everyone feels actively involved.
User needs statement
The gathered information can be translated into the the User Needs Statement, which is displayed below.
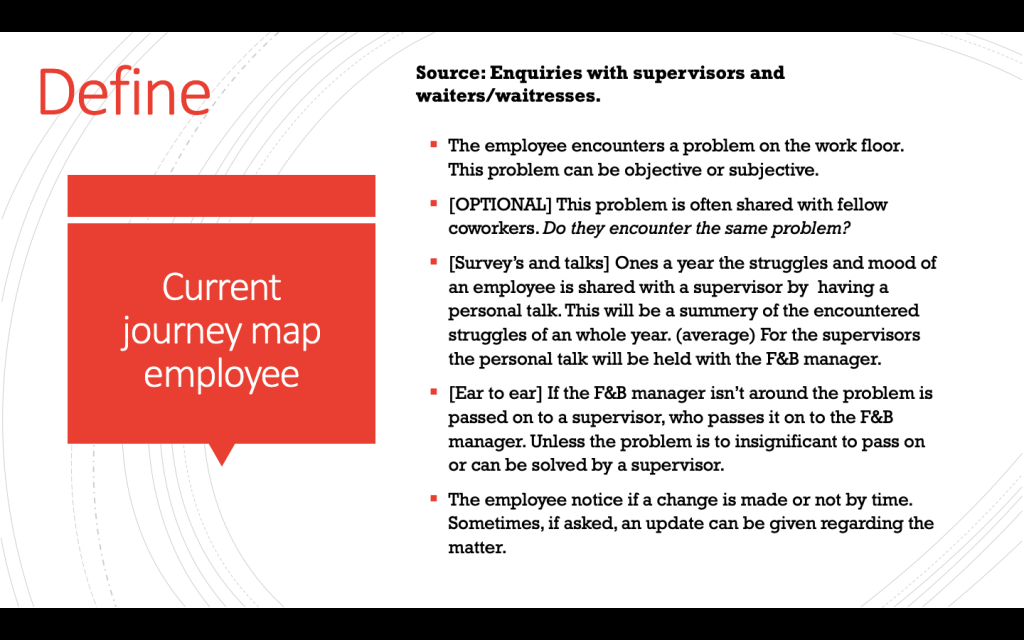
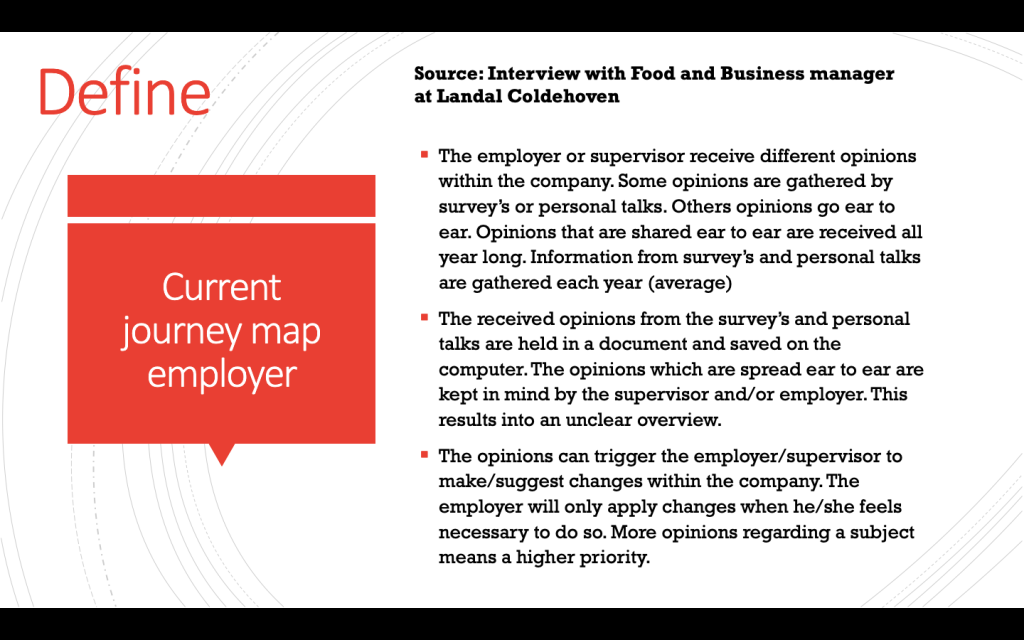
To define this user need statement further, two journey maps are made. One for the employee and one for the employee.
The situation displayed above is one which is built from a catering experience. This method tells me that the problem is most of the time passed on to a supervisor but you will have to ask if a change has been made.
This situation which is displayed above is also one which is built from a catering experience. This method tells me that the received information from employees will create an unclear overview of the total of amount of problems that are present. This is a problem for a supervisor of boss because they can’t solve problems efficiently. The root-cause will be blinded because of all the symptoms that are indicated by employees.
In 1.2 the ideation phase is illustrated together with the requirement of the solution.
Time spend for empathy and define : 2,5 hour
Summary of importance of the survey: 0,5 hour
Summary of importance interviews: 1 hour
Summary user need statement and journey maps: 1 hour
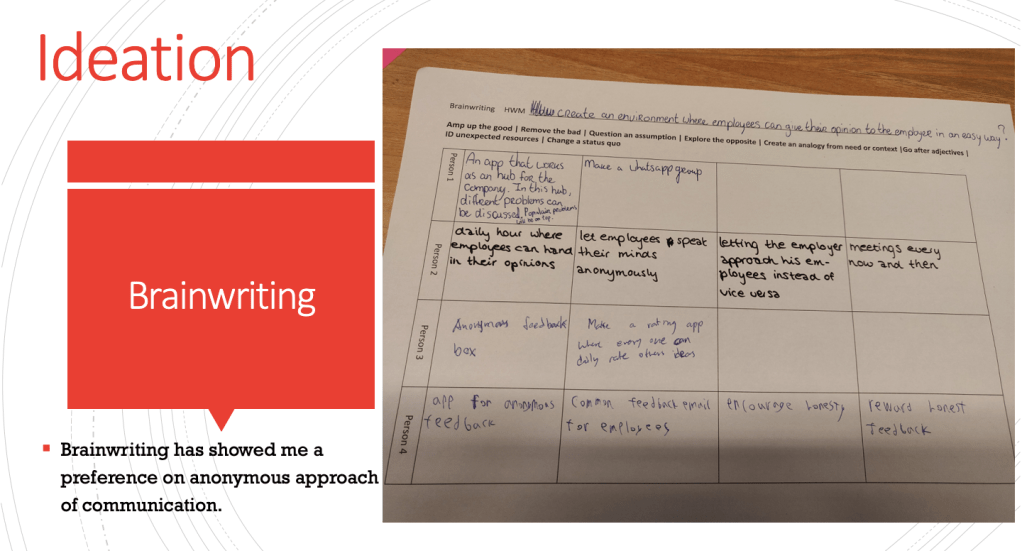
How might we create an environment where employees can give there opinion to the employer in an easy (and quick) way? I tried to find a solution by a Brainwriting session.
Solutions like this are not strange to me. I during my trainee time at Gazelle. We held a daily STIP meeting. This meeting is almost the same as the mentioned daily hour and the meetings every now and then. Letting the employee approach the employees is key for getting important information. When the employee noticed something wrong, most of the time his team manager got the information from him. He would put the information into a google form on his tablet our computer. I worked on perfecting the Google form during my time at the Quality Department of Gazelle. I created different Google forms for different production departments. When an employee noticed something wrong, they needed to fill in their department, the category of the fault (damaged or wrong design for example) and their insight on where and how it went wrong. I would like to create an app which can be used for this kind of problem solving and with it increase employee satisfaction by working together.
Functional demands of the app
Must be able to log into two different app layouts à managers/supervisors and employees. (Conditional rendering).
Must be able to send messengers between accounts.
Events
Must be able to post new events (only visible to yourself).
Must be able to see events within the company (created by managers).
Should start with an overview of all events (yours and the ones created by admins).
Preferably be able to sync with Google Calendar.
Home screen
Must be able to access events, submissions and topics.
Preferably be able to add new events, submissions and topics.
Submissions (general)
Must be able to receive reactions on submissions from admin accounts (created by managers).
Must be able to send submissions to admin accounts.
Must be able to look into old submissions.
Should be able to say when a submitted issue has been solved (according to the user).
Should be able to search into your submission overview.
Preferably be able to contact managers personally and supervisors about a problem.
Submission (content)
Must add title and explanation for the issue.
Should be able to choose which category (for example: Tools, colleague’s or product), so the admin can connect them to certain departments within the company.
Should be able to add photos.
Preferably be able to say which how frustration the issue is (by adding a level of frustration for example: 1-5).
Topics
Must be able to add topics.
Must be able to see topics within the company (created by managers and employees).
Preferably be able to define the importance of a topic by the creator of the topic.
Machine connection
To create a more powerful tool of employee satisfaction I did some more research. The link below brings you to one of the most interesting sources i used.
The idea of a visual status of the well doing of the employee satisfaction within the company from a physical machine is maybe a little weird, but it serves a key function. By having a small setup on a place where most of the employee come through daily, it will keep people daily up-to-date with the status of their unsolved and solved problems within the company. They contribute by sending insights, which helps solve certain problems. To create this machine, a few questions have to be answered:
How will the machine look like?
What information does it receive?
What information does it display?
How does it receive? (bluetooth)
How does it display? (led-lights)
In the first post I already introduced the idea of the machine as a machine which can turn red, orange or green depending on the amount of insights and problems that are left to solve. If you make it visual for the user, it will trigger the user much faster. This idea will be further explained in the design phase of the project.
Time spend for documenting: 5 hours
Time for adding functional demands of the app: 1 hour
Summery of important ideation previously done: 0,5 hour
Time for sourcing powerful ways of displaying information to users (employees and employers): 3 hour