Featured

Start App design

Ideation

The design idea

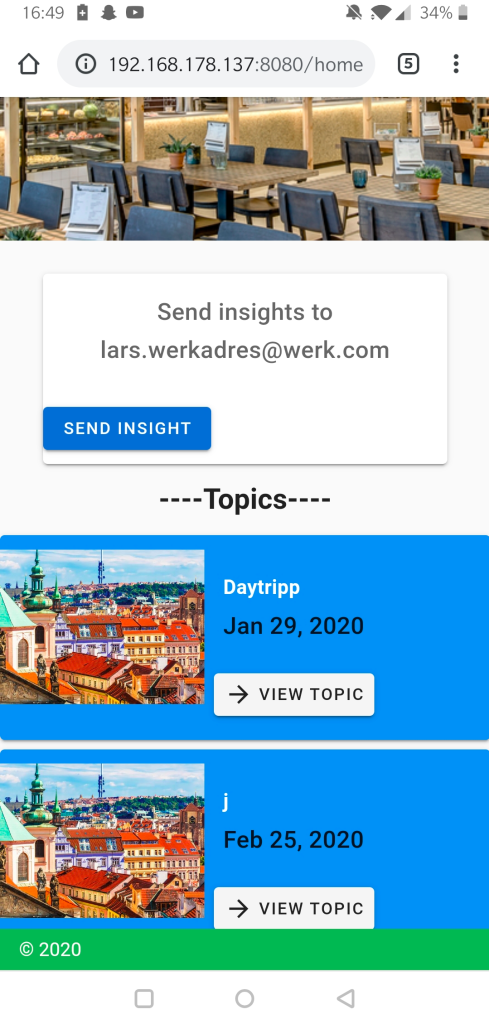
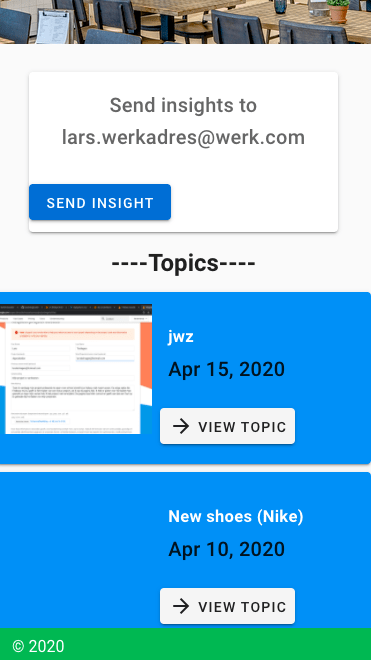
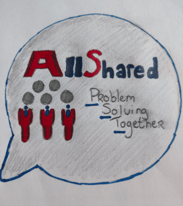
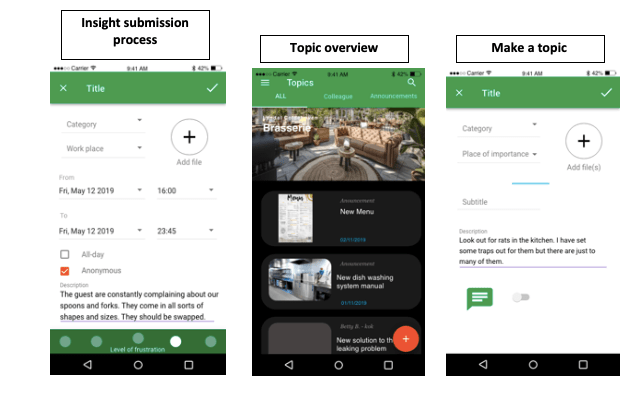
The employee can fill in insights about their experience during work into an app. The input will be in summery. If the filled-in insights are negative, the machine will display red. If the input of the app is mostly positive, the machine will display green. Every input in-between will end into an orange output of the machine.

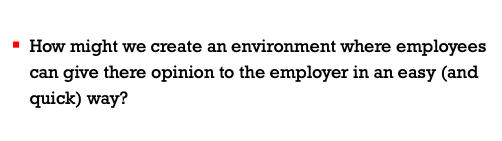
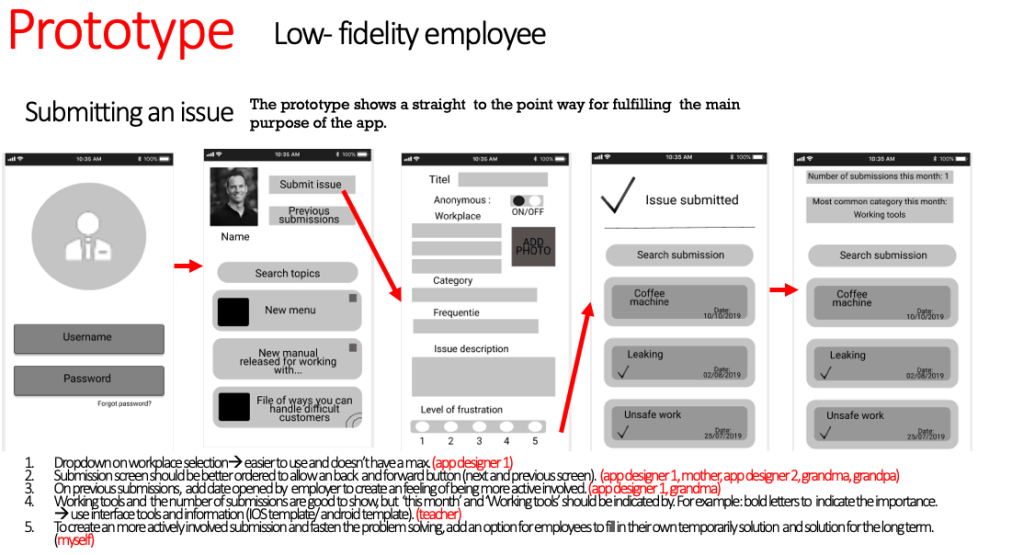
The main idea of the project is to create the app and let employees share their working experience and with it feel more involved within the company, the machine can give a visual representation of the working experience within the company. All the input of the employees will be put into an overview for the designated department to see. For example: If mechanics fill this in, the supervisors of the mechanics or a person who is appointed to gather employee information will get a notification of the submission. The submission will be sent to the department that can do something with the given insight. If the insight doesn’t apply to the department, according to the department, it could always be passed on the someone else within the company.

The department can process the insight by letting the employee know the issue is something noted for the long term, that they are prioritising the problem and solving it within a given time-period or simply saying they are dealing with it. The insight can also be seen as something to accept, or too hard/ impossible to handle, this should be communicated. By closing an insight, the issue expected to be solved (according to the department). In order for the employee to find the problem solved, the employee can also close the insight.

More open insights mean the machine will turn red, this red display can be lower by doing one of two things:

1. Lower the amount of open insights by solving the issues;

2. Changing standards: The amount of open insights that will indicate a red, orange or green light signal.

Note!

In order for the app to be implemented into an organisation. There needs to be an admin account for the company. In this project the focus lays on the employee part.

The progress of the project can be seen in Trello.

Already gathered information

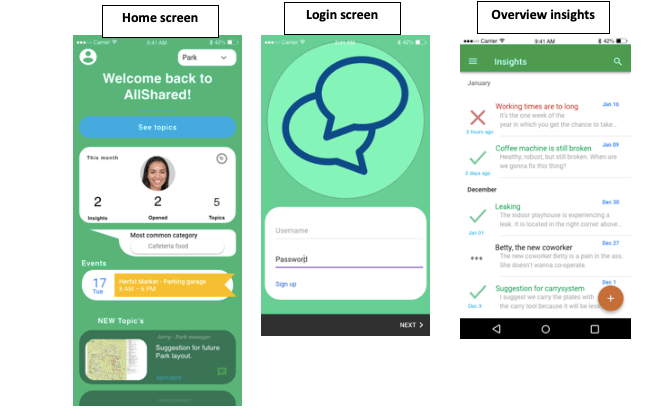
I summarised the relevant information that I already gathered. The app design I made in the ‘design of mobile apps’ course is a good starting point. I made a design of the app, did some research on existing tools and substantiate the urgency. The design choices are based on other programs and methods who help companies get their employees more involved within the company.

Intranet –> fills the function of keeping everyone up-to-date but does not support feedback from employees.

Yammer –> fills function of keeping everyone up to date and support feedback from employees.

Suggestion box –> Feedback by topic.

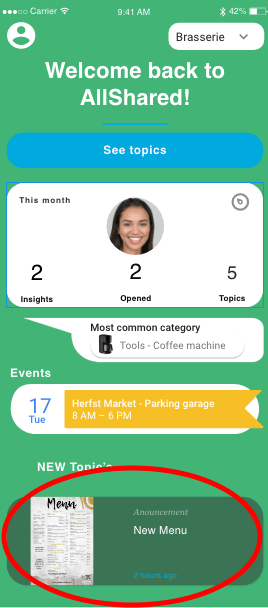
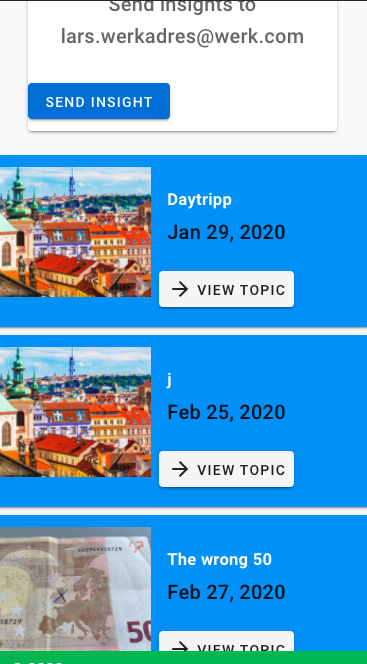
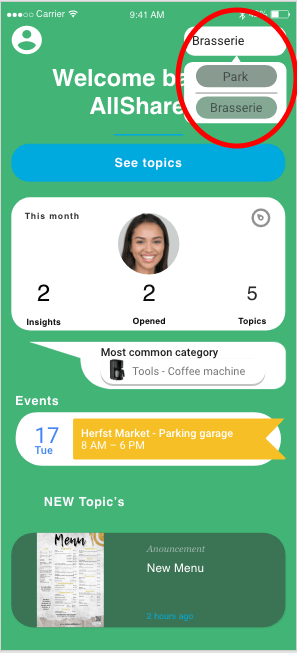
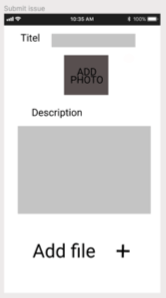
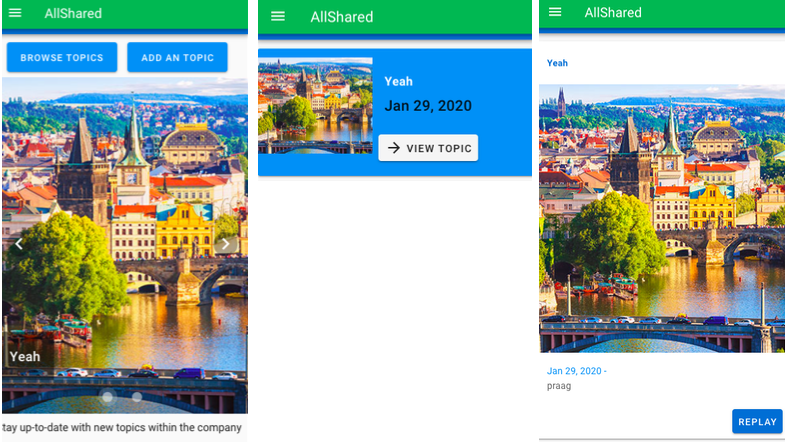
Already made layouts for the app

Milestones for the project

Ideate on the subject and find out if the problem is actual an ‘problem’.

  • Getter important information from the previous design of the app;
  • Translate the already made designs and information into a functional demand list so the new app can be build out of this demand list.

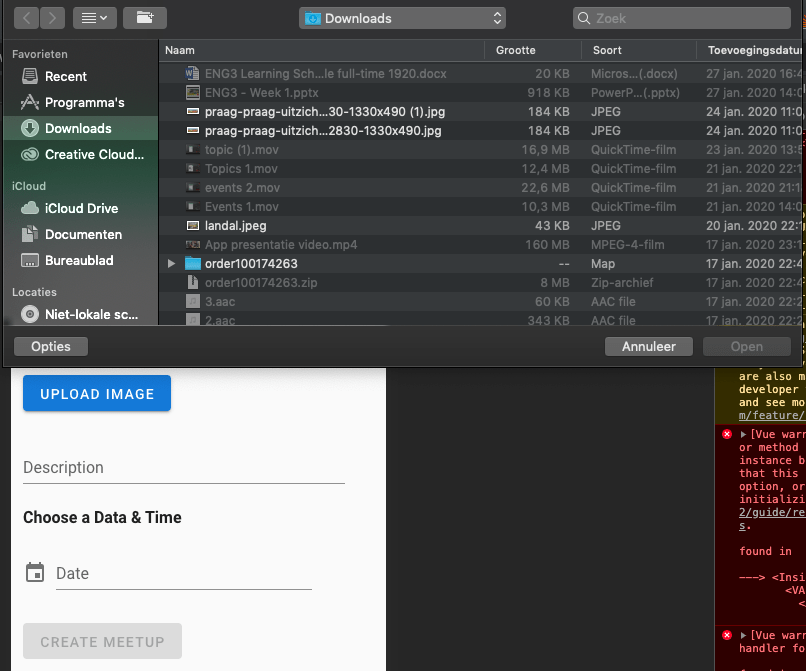
Make the app  –>  Tutorials for programming part (YouTube);

  • Find a programming tool;
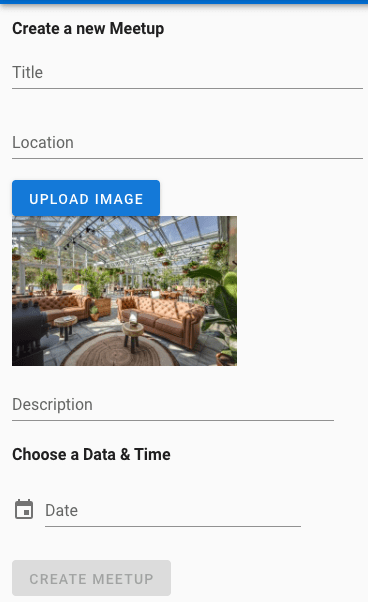
  • Make a login screen with a Hotmail and password;
  • Make a home screen;
  • Make the submission of insights with overview (let users choose which department is responsible);
  • Make the overview of topics and the option to make new topics;
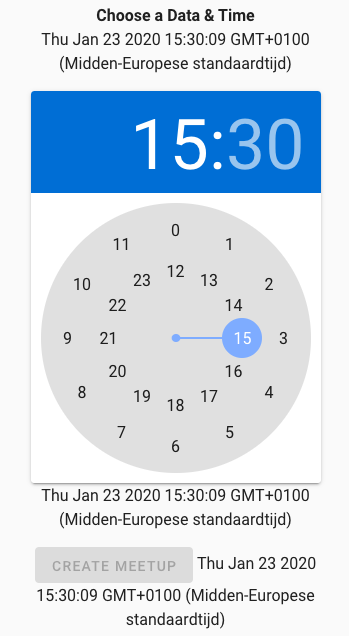
  • Insert an agenda with topics to put in;
  • Test the app with at least five persons.

Make the app send a Bluetooth signal to communicate with a machine. This machine expects an amount of open and closed submissions;

Make the receiving machine –> Ask Harry for the Bluetooth receiver and the display of the received info;

  • Make at least three designs for the machine à with connected a Bluetooth receiver and a way of displaying.

IDEA: The machine can have a counter which displays the amount of submissions. The counter can be in the shape of a vertical rectangle (battery like). The amount of LED’s that are on will display the amount of solved submissions in comparison with unsolved submissions. When a certain degree of unsolved submissions is reached, the counter turns red.

5. Let the app interact with the receiving machine (preferably via a mobile).

Time spend for start app design: 7,5 hours

  • Time spend for introduction + setup milestones: 2 hours
  • Time spend for logo: 0,5 hour
  • Time spend for setting up WordPress and Trello (including tutorials): 2 hours
  • Time spend for watching youtube, reading about the importance of the subject: 3 hours oa: https://youtu.be/cCdu67s_C5E https://youtu.be/HRwTnFO43zw

14 testing the app

For this part of the project I tested the final product. Some of the desired functions where not realised in the final result, but it is key to test the results in order to get a good working app with the functionality it does have. In order for the final users to really use the app I have to ofcourse test the app. For this part I like to thank my girlfriend and mom for helping me with this. They gave my insights of things I already knew but also of things I didn’t really pay attention to or just forgot.

The test users did a few actions I asked them to do. They gave answer on some functional questions when performing these actions. In the end I ask the user what they found of my app and where the might want to see some improvement. Per user there has been indicated on what kind of level they are experienced with apps, mobile phones and that kind of technologies.

Tester one (Nurse student) Good experience with technology

Register a new account: Succeeded – (notifications work fine, she didn’t used a correct email, but she renamed it).

Send insights: Succeeded – She noticed that she could send an insight via the indicated button on the home screen. She also saw which email adres to use to send the insight too. The link to microsoft outlook also was clear for her, she could have logged into to her email adres, but for testing purposes she didn’t).

Go to topics: Succeeded – She could find the topic list. She used the toolbar in order to get to the topics. She noticed when opening a topic she could open the reply option. The reply option isn’t coded yet.

Make a topic: Succeeded – She could find the make a topic button on the topic page. When making a topic she could fill in everything except the choose a date & time button, this part of the form doesn’t work the way it has to. Date & time doesn’t indicate which date has been chosen. It stays blank. The text “date and time” isn’t written the right way (data instead of date).

The topic that has been made: Wrong – The topic isn’t ordered the right way. The user immediately noticed that her newly made topic is stored all the way down in the topic list. This causes the topic not to be featured in the home page. The topic also doesn’t show the picture that was used for the making of the topic.

Change name and date of the topic: Succeeded – She could change the name and topic but she noted that she wanted to change the picture if that would be possible.

Has something happend last month: Succeeded – She could find the events page in the toolbar and saw that one of her colleges has put a topic in. She noticed that there wasn’t any feedback of the events on the homepage.

Can you delete the old event and make a new one: Succeeded – She can delete the old event and the new event is displayed. This stays when I asked her to refresh the page.

Do you have any other feedback on the app?: She noticed that the button “insight view” does bring her to the topic page (this is because I was testing to use firebase for the sending of insights). And last she noticed that she couldn’t open the settings page.

Aanpassingen

  • Insight view deleted from toolbar
  • Settings deleted from toolbar
  • “data” change to “date” in created topic part of the app
  • pictures are back
  • Made the topics add from top to bottom

To invert the way of the display of the topics I manage to find the reverse function. When trying out this function for myself, I didn’t succeed. Eventually I manage to put a function together from one I fount on the Stackflow forum the link is placed below.

https://stackoverflow.com/questions/44442816/firebase-date-order-reverse

When the meetups (topics) are loaded, I immediately turn them around so the newest ones are displayed on top. This way the topics are displayed the right way on the home page as well, as can been seen in the picture below.

Tester two (administrative worker) Little experienced with technology

Register a new account: succeeded

Send insights: succeeded – She noticed that she could send an insight via the indicated button on the home screen. She also saw which email adres to use to send the insight too. The link to microsoft outlook also was clear for her, she could have logged into to her email adres, but for testing purposes she didn’t).

Make a topic: Succeeded – She went to the topics menu by clicking on the tekst ‘topics’ on the home page. She succeeded in making a topic, but she must select an image in order to post the topic.

Change name and date of the topic: Succeeded – She could change the name and topic. The reply button is visible, but not useable.

Can you delete the old event and make a new one: Succeeded – She can delete the old event and the new event is displayed. This stays when I asked her to refresh the page.

Do you have any other feedback on the app?: How do I know what the homepage is? Maybe put a home icon or change the name from ‘AllShared’ to ‘Homepage Allshared’

Tester three (flight attendant) Badly experienced with technology

Register a new account: Succeeded – She tried to make an account in the login page but this is the default page where you start when opening the app. Eventually she could login making an account.

Send insights: Succeeded – She noticed that she could send an insight via the indicated button on the home screen. She also saw which email adres to use to send the insight too. The link to microsoft outlook also was clear for her, she could have logged into to her email adres, but for testing purposes she didn’t).

Make a topic: Succeeded – When you scroll down on the homepage site you can’t see the drawer. Because of this she accidentally clicked on the home page of google and went back to the google starting page. She had a comment that she didn’t have any kind of feedback when she could post the topic. When you didn’t selected a photo, you can’t send the topic.

Change name and date of the topic: Succeeded – She immediately knew which button to press everything is clear about this step.

Can you delete the old event and make a new one: Succeeded – She held down one of the events, this doesn’t work if you want to select an old event, but eventually she just tried to click ones. Clicking ones is the only way to select an event.

Do you have any other feedback on the app?: Is the e-mail adres, which is indicated on the main page, the person of contact for everyone in the company? Answer: The company can change this text to their liking. I haven’t made an admin account who can change the text when just logging in with their account in my app. If the indicated e-mail account is to be changed it has to go via a programmer who can update the app for the company.

Fault

When making this blogpost it didn’t save the right way the first time I made it. This resulted in losing a lot of data. Luckily most of important testing results where still there and I remembered some of it. This happens sometimes when opening the blog after it has lost connection. This is why I almost always save my progress after just making a few alterations in the blog. But sadly I forgot to do that this time. This is also what I have learn during programming of the app. Save after almost every step, otherwise I can lose some code or I can’t track the new error that just has popt up

Reflection

I liked doing this part of my project. Working with actual users instead of constantly looking for technical coding solutions on the internet. I learned some testing methods during the making of the app in the lectures of ‘creating a mobile app’ in my minor. I found it fairly easy to do this step. Most of the feedback I have gotten was to be expected, but I was quite surprised what kind of comments I got on my app. The test users where quit enthusiastic about the idea and the actual app in general. The functions that I have worked out could be used most of them said.

Time spend on testing the app:

  • Making the setup: questions and volunteers: 3 hours
  • Volunteer one: 1 hour
  • Finding solutions for the indicated problems and implementing them: 3 hours
  • Volunteer two: 1 hour
  • volunteer three: 1 hour
  • Repairing lost data: 2 hours
  • Writing the blogpost: 3 hours

13. App publication/ build

This step is diving into the final fase: publication of the app. I want the app to be downloadable on your mobile phone. For this part I did a lot of research since I wasn’t quite familiar with key words I needed to look up. I knew the publication proces needed to be compatible with the Vue tool and the Firebase database. I did research with the key words: ‘publication ‘,’Vue’ and ‘Firebase’ but I could find anything on Youtube and multiple forums that helped me.

As can be seen in the picture below, there is a built option. I tried this out, with hopes that it just gave me a file I could upload to my mobile found, but sadly it just gives my another file. I also tried to look up how to use this file to my benefit and make it so it can be downloaded and used on my mobile phone but I still could find anything that helped me on databases like Youtube and forums. I extended my research with terms like ‘build files’ and also looked on the Vue and Vuetify website.

After consulting with my teacher I further extended my research. I did this by looking into Github Pages and Firebase hosting. The links to the websites can be found below the both explanations.

Github

You can publish packages in a public repository (public packages) to share with all of GitHub, or in a private repository (private packages) to share with collaborators or an organisation. You can use GitHub roles and teams to limit who can install or publish each package, as packages inherit the permissions of the repository. Anyone with read permissions for a repository can install a package as a dependency in a project, and anyone with write permissions can publish a new package version. Package works as an Google Docs where everyone can read your code or write in it, depending on what kind of permission you give them. This is not the usage I am looking for, but still very useful for saving purposes. With help of the Github app I could manage my code via my mobile phone. Maybe It will also let me run it? This was interesting, but I looked at further possibilities.

GITHUB: https://help.github.com

Vue and Github

I couldn’t find a right pages introduction/instruction on the Github page itself, but I did found one when searching on the Vue deployment page. It still isn’t very clear to me what I need to put in my vue.config.js. From here on I decided to first do the firebase path since I use a Firebase database and i wasn’t sure if the Firebase database works when I don’t deploy the app via Firebase.

VUE Deployment:https://cli.vuejs.org/guide/deployment.html#pwa

Firebase

For Firebase I looked at information on there website and also found some instructions on the same ‘deployment’ page which is located on the Vue website. The picture below shows the first part of this firebase deployment instruction list.

After installing all hosting materials I choose my current firebase project, which is named: Appcalendar. This is because I first used firebase when I made my calendar. The pictures below show some screenshots of the firebase hosting initialisation.

After setting up firebase hosting for my vue.js project I checked if the project was indicated in my Firebase CLI:

Yes it was. So I served the application on appcalendar-dd352.firebaseapp.com and got this screen:

I read the hosting documentation but it didn’t helped me any further. So I went back to Youtube and tried to find anything useful on hosting with firebase and vue.js. I found this playlist:

After carefully doing every step in the vue.js tutorial above and learning something about the cd command in the terminal in another Youtube video, I couldn’t find my firebase project anymore. This got me a little upset because this is where I safe my logging in credentials, topic- and calendar details. As can be seen in the picture below, the project isn’t there anymore.


FIREBASE: https://firebase.google.com/docs/hosting

I have send a massage to firebase to retrieve my project, for the time being, I am going to focus on the other steps. This because I need my storage in order to deploy my app. In the summery below I will show what I am missing in my app, what kind of things I learned in this step and what is in the last two steps of this project.

After getting back my Firebase project

Reflection

This step of my project was really annoying. After searching I finally thought that page or Firebase hosting could help me get my app deployed, but sadly it didn’t. After making account, trying out plugins and watching tutorials I still didn’t got the app on a mobile phone. To my experience I did this proces quite carefully and read every manually that showed up, but I still missed something.

https://cli.vuejs.org/guide/deployment.html#previewing-locally

End results

Still missing

  • app is missing the settings options
  • app doesn’t have different account types (supervisor and employee)
  • app isn’t deployed on a mobile device

Tricks I learned

  • How to use Github packages – 2 hours
  • How Github pages could be used for vue.js (didn’t succeed myself) – 5 hours
  • How programmers use Github in general, even with there mobile phone – –
  • How Firebase hosting could be used for vue.js (didn’t succeed myself) – 6 hours

This page cost me around 2 hours to build

Whats next?

  • Testing out the app with users (step 14)
  • my creative development (step 15)

12.2 Feedback in homepage – Topics

To give the user feedback on a post that just has been added to the homepage, I want to connect the information displayed at the topic page. The topic part inside the home page only shows one topic. This is the last added topic to the page. So the user can see that a new topic has been added. The picture below shows how intended it to be indicated on the home page.

The picture below shows the first try to implement the topic information.

I subsequently I managed to find the slice option to only feature the two last added topics to the homepage.The picture below shows how this looks like.

The video below will show how I this part of the coding process worked out to be. The option to reply still isn’t used.

While updating the homepage, you can see I change some display aspects of the home page to let it look better.

Reflectie

During the making of this part I manage to exactly work out the functionality aspects I wanted to work out. I knew the slice function from a while back so it was nice to see how some of my experience does help.

Time spent on User feedback of Topics

  • Finding different solutions to display topics in the home page: 2 hours
  • Implementing with help of splice: 1,5 hour
  • Writing this blogpost: 2 hour

12.1 Editing topics

In this blogpost, I am going to explain how I programmed my code to edit information within topics and how to delete topics in the front end of the application. To find out how I needed to do this I continued with the playlist underneath.

Editing details

When I followed the step I noticed in the console that the slot ‘actuator’ in the button of the dialog didn’t work. So I searched how to solve this problem in the comments of the Youtube video and on the internet, but without any luck. Eventually I found a other method in the components page on the Vuetify website.

https://vuetifyjs.com/en/components/dialogs

Editing date

For the editing of the date I encountered a struggle where the data wasn’t compatible. Luckily I found a comment where a solution to my problem was found.

Result

In the video below you can see the result of the editing codes.

Reflection

It was nice to know how to use the time picker twice, and learn not to overwrite the date if used incorrectly. If the date data is stringed, it does work. The first time using the picker went easier, because you only had to connect it to the store and with it, Firebase.

Time spend on editing topics

  • Watching the tutorial (editing date and details) : 2,5 hours
  • Trying to find a solution on the actuator slot: 1,5 hour
  • Trying to find a solution on the editing of the date: 2,5 hour
  • Typing this blog: 2 hours

15. My development

Technical development

In this last step I will discuss what I learned during this project, how the knowledge I gained is going to help me in the future, where I still want to develop (regarding programming), and which methods I need to adjust when working again on a project like this one.

What did I learned?

I learned how to use Vue and Vuetify as programming environments. Besides helping me with pre-made layouts of the app and ‘sortcuts’ for javascript purposes this code also helped me to understand HTML and CSS. I learned this language by just doing and trying. Watching tutorials, playlist and whole lectures helped my to fill in most of the gaps during my programming. Some of the lectures also gave me the options of doing certain exercises in order to better understand some of the code.

I can now setup Vue.js with plugin Vuetify. To store data I learned to use Firebase. Youtube tutorials helped me understand how to store data on Firebase. The link between a database and the actual code is something I can now track down in a code.

Furthermore I learned how to work in steps quite well. So my planning skills are improved as well. A step takes time but it is so satisfying when something works. There is so much you can find online, before I wasn’t very technical beforehand, but I really do think I can make more advanced codes than I made in this project when I just take my time.

Where do I still want to develop myself in?

Regarding programming I want to understand HTML, javascript and CSS better. Maybe when working in a company, after my study, I try to sign myself up for a ICT study/course. I find it so important to understand computers and my IT collegues. I experienced that mainly during my first internship at ‘the royal Dutch Gazelle’ plant in Dieren.

Reflection on the technical part

The project was kind of a black box project. I knew some Javascript, that the teachers could help me all the way and what kind of product I wanted to deliver: To actively involve employees and with that, make it easier for employers to solve problems within the company. But the big question was of course: HOW? I didn’t had any experience and what better way of learning than just choose something completly out of my expertise. Now I know how my project went I can reflect back on the whole proces. Some things I simply didn’t knew at the time (things like NOTE.js for example).

Next time, for maybe working something out what helps me keep track of some information during my work.

  • I have all the nessecary instalments done in front. This will safe me a lot of time.
  • Not try to learn everything by just simple watching or reading, but also by doing.

Technical progress regarding my studie: Industrial Engineering

For my study I really wanted to, as I set before, understand the way an IT’er thinks. This way I can better work together with them and create solutions I can really understand. Mainly because computers are increasingly getting important. I work with ERP-systems like SAP. These systems store all of the information getting in and out of the company. I work with computers which are secured in cooperation with google and other companies. And I work with programs which are important for contacting clients and suppliers.

For working efficient within the company I need to learn how to plan my time. This could be done with help of planning programs I used during this project.

Creative development

In addition to developing myself in the technical aspect, I also developed myself on the creative side of the designing proces. I looked at thinking methods of big companies like Google and Apple. How do these companies persuade people to use their apps and on which aspects in an app are important? The way a user things is very important. In addition to thinking about the actual design of the app, I was also able to think about what kind of demand the app will actually fulfil. I had to think about a good topic for my project for a long time. The thinking proces started with a project that took place before this project: Designing mobile apps. During this project I was able to get a number of different ideas from classmates. In the end I chose to fulfil a subject on the work floor: Employee involvement.

Employee engagement can be improved in several ways: progress interviews, appraisal interviews, interviews and news via email, whatsapp or an app. I have tried and analysed many alternative as: News app KLM and Jammer.

Creative development regarding my studie: Industrial Engineering

The user demand is something every company needs to pay attention to. If there isn’t any demand for what the company is creating, the company is doing something wrong. So by learning how the user uses what you have made and using the feedback to create a better product, you create a more valuable product for the user. This works exactly the same in my studie, I need to create/optimise a proces or product so it has the more value for the user or in some cases for the company.

The status of the project

The video below shows the whole app so far.

What needs to be done in order for this app to be used in companies:

  • Protect the app from onwelkom editors/admins;
  • Create admin accounts for the supervisors to be used (or a specific person which is selected to create topics on behave of the supervisors and pass important information on to the supervisors)
  • Let the users account be linked to their specific department within the company (maybe by choosing this when making the account)–> this information can also be stored in firebase;
  • Maybe purchase storage on firebase of extra data to be stored;
  • Automatically delete topics when they pass an certain time to still have enough storing space;
  • Create the option to manually delete own topics (admin accounts can delete all topics regarding their department);
  • Create a settings option for the users to change things like notifications ,change which department they choose when creating the account and turn on the option to answer anonymously;
  • Let the user change between topics send by only their department and topics send within the whole company (example below);
  • To reduce the amount af topics, let only the admin accounts send topics for the whole company to see. If there is something important, you can send a insight to your designated e-mail account where you need to send the insights to (indicated on the home page);
  • Let the admin account change the on the home page indicated e-mail account (per department);
  • Create the option to send insights anonymously, this can be done by creating a general e-mail account within the company. The user must see if their insight is send anonymously or not. This proces could be made with the current method: working via outlook, but was intended to be made the same way as the topics are made. This is done via Firebase. If done via firebase it could be made as an survey. If made as a survey, the supervisors could efficiently gain information out of the topics (example below, issue is the same an insight);
  • Create the option to add a file (example below).

Business part of the app

When all of these changes are made, it is time to test the app out in a real company. The list below shows my initial approach on the business aspact of the app. The list show how the employer finds out about the app.

To counter some obstacles regarding the business part of the app, I looked at some ted talks of ideas. The link to the Ted Talk video is displayed below:

The video above gave my insight on looking at different capabilities a user has.

The video above shows that sometimes perseverance is key. A company like Whatsapp started as a status update app but kept listening to users and eventually find its way to messaging other people. Candy Crush is made by king and king didn’t made successful game before 11 years. Started at web-based games and growing from a facebook game to a mobile game.

New Logo design

I have made two new designs. The two pictures below show the first new design.

The picture below shows the second new design. I choose this design as my final logo design.

Time spend on ‘my development’:

  • Technical development: 3 hours
  • Creative development: 2,5 hours
  • Status of the project: 6 hours
  • Business part of the app: 4 hours
  • New logo design: 1 hour

Visual storytelling week 8&9

This week I finished my final introduction video. The video is displayed below.

The music is maybe a little bit too loud for my commentary, but it came together quite nice. I liked working with the camera I got at home and shoot multiple scenes. My girlfriend helped my in the roll of employee. I myself fulfilled the roll of supervisor/employer. I tried to distinguish the two rolls by putting on blouse.

I liked the editing part the most. In the last ‘Visual Storytelling’ post I explained how I was getting myself familiar with Hitfilm Express. The editing of the video went OK, but I noticed my laptop struggling with the file size.

In the end, I can say I really liked the story telling lessons because it showed my that editing isn’t that hard if you have a nice idea. It was mainly getting the right shots and scenes what was quite hard.

11. Submitting insights

Before I began the submitting of insights part of my project, I wanted to store my files before I lost everything by accident. I did this via DropBox. The other storing choice I considered using for storing my code files was Github. I checked out the Github method but it comes down to the same concept as dropbox.

Just to be extra safe I put a copy of the app into the cloud. At first I only saved it onto my harddrive.

Submitting insights

To start simply, I just want to create an Outlook like layout where e-mails could be send. So why not add a link to outlook? This way the submitting process gos via outlook and you could use the same work E-mail adres as you are used to. Employees do need to know where they send the submissions to, so I thought of displaying this in the first page that you encounter when choosing to send an insight. The person within the company which is responsible for replying and using your feedback could be found on this page and a button which serves as a link to your e-mail account. This wil result into an extra action. The action list:

  1. Press the insight button on the home page or in the drawer of the app;
  2. Copy the e-mail that is displayed on the insights page;
  3. Press the button which brings you to your e-mail;
  4. Send an insight on your e-mail adres;
  5. Reopen your app.

The best method is when you have an account which is linked to a specific function within the company, that account is linked with the person which is responsible for managing that specific function. Than you don’t have to fill in the the e-mail adres of the person which is responsible and are instantly send to your e-mail. I tried making a link via the method underneath. Which, eventually, also brings you to your Outlook account. But lets you fill in to which e-mail adres it is send to. This didn’t worked out for me because it costs money. I tried to find variants which are free and efficient but didn’t found any other solution which is possible with my skills.

https://mailtoui.com/#menu

With the picture below I indicated the change from my original plan. At first I thought of a pre-designed questionary where deferent questions would be answered in order for the manager to understand the insight as good as possible.

The video below shows how I implemented the idea’s of the submitting process into the app.

Feedback to the user

After defining how to create the submitting proces, the only problem I faced was how to constantly keep the user updated on the situation of the submission. The picture below shows how I initially wanted to fill this part in.

I looked on youtube and on different forums how to implement certain information form your e-mail inbox into the app. Sadly i didn’t found a way the e-mail information. This ment that I couldn’t display any reactions on e-mails in my app. The user has to quit the app and go to their e-mail account to check if anyone has reacted on the insight.

To get the user to see the progress on the problem which the insight is given from, I want to show this in the main menu. I tried using the firebase option with help of Vuex, but that also ment I needed to change the way of sending the submissions and could not do this via outlook. I tried making a pre-made form with help of the youtube playlist underneath.

I only watched the last few of this serie because I already had experience with the first few steps.

Eventually I choose to just keep the link to outlook. To see replies on insights, the user must log back into the outlook e-mail adres. The picture underneath shows how the link is indicated on the main menu.

Reflection

In this part of my project I did a lot of background work which resulted in little. I only added a few buttons which links the app to your e-mail adres. This was quite a bummer for me since I imagent more user feedback. I noticed that much of the previous experience was hard to bring back since I left the project for a few weeks. I was relieved I saved my code on the cloud and dropbox when I got back to programming. The main skills are of HTML and javascript are still there, but when it comes down to working with CSS and firebase I still need to do some research. Also working with Vuetify comes with a different coding environment this is something I almost forgot when beginning to work on the project again.

Time spend on ‘submitting insights’:

  • Learning more about Github and dropbox: 1,5 hours
  • Using dropbox and saving files: 0,5 hour
  • Finding solutions to submit insights: 4 hours
  • Creating a link and trying out the ‘maltoui’ link: 2 hours
  • Implementing the link to the e-mail adres: 0,5 hour
  • Finding an solution for user feedback: 3 hours
  • Writing this blogpost (and making videos): 2 hours
  • Trying the firebase option: 1,5 hours

10. Topic info

I choose to add topics, not by link but by picking a file. The youtube video below is where I learned the first part of implementing files in the application, with help of FireBase.

The youtube tutorial teached me how to input a file instead of a link. In the picture below you can see the opened finder venster and the button to add a file. When the button is pushed and a file is chosen. The picture will be displayed.

Struggle

In the youtube tutorial I could not find an other other for MetaData.downloadURL, because this command was outdated. It was hard to find a solution that fitted this setup of my application. The because the right comment/method of this part of the code was missing, the fetched files in the firebase folder didn’t contain the picture Urls.

While the pictures where being stored into the Firebase storage:

Solution

My first lead on a solution was the suggestion from Firebase itself:

The same approach was displayed on the official site of FireBase:

https://firebase.google.com/docs/storage/android/download-files

Sadly just altering some parts of the code didn’t work. I had to dive deeper. The Youtube video and the link to a forum below showed me a different approaches, but they didn’t use the coding style I used. It still gave me some understanding of a same situation, but in a different coding environment. The FireBase commands are mostly the same.

https://stackoverflow.com/questions/50883632/how-to-get-downloadurl-from-firebase-storage

In the end I watched the comments underneath the Youtube tutorial I follow in the beginning of this step. The first youtube link in the upper part of this blog will bring you to the Youtube video in question. Eventually I found a solution to my problem.

Reflection

I found this step annoying. It reminded me to my lack of experience. The research I did started the wrong way. I was looking for a solution that fitted my coding environment, but search results gave me all kinds of different scenario’s. I learned that it might come very helpful to look at the comments people come up with solutions to almost exactly the same problem I encounter.

Time spend in Topics info

  • Watching first Youtube video(a few times): 1 hour
  • Implementing first part of the code: 3 hours
  • Adding storage and changing authentication of the storage (with online investigation) : 2 hours
  • Finding solution (explained in blog): 6 hours
  • Writing the blogpost: 2 hours

9. Sign in/ sign up

Added funtionality

User accounts saved in Firebase

In this blogpost I will upgrade the sign in/ sign up so a user can sign up. When signing in the user can only sign in with an existing account. The accounts are stored on Firebase.

When the application is opened, the user can see a login screen. This used to be only a js function. When you pressed login, it will always bring you to the next page. Now it will give you the option to register and login with your registered account.

The eye icon on the login page doesn’t work yet. It should make your written password visible.

Display of login/register errors via Firebase

Authentication errors don’t work when the filled in password isn’t long enough(sign up) or when other errors occur when signing in. This notification will notify the user that they did something wrong instead of waiting when the next page is loaded.

I had to create a method that catches the error displayed in the terminal by Firebase. The separate code for displaying the error text within a red bar is displayed below. Where the code is initiated and loads the errors from the store/index.js can be found in my final code.

Add option to logout manually

To change which account you logged in with you can logout. The logout button will bring you to the sign-in page.

Keep being signed in when refreshed

I can login, but when I refresh the page, I need to log back in. So I changed it that you that nothing changed until you pressed logout or open the application again.

Only add topics when signed in

When logged out, the user can’t add a topic. When a topic is added by a user, the topic comes with the userID. By adding which user post the topic, you can choose admins.

Sources

The Youtube tutorial I used in the previous steps was also quite useful in this step.

Further more I used the Vuetify component page for some display purposes and did research on how to change the authentication of the Firebase database with help of online blogs.

Time spend on login/logout

  • Add the users option to Firebase: 1,5 hours
  • Add the option to create users and load them in my own code: 3,5 hours
  • Firebase authentication: 3 hours
  • Fine tuning of the Log-in/Log-out by finishing steps displayed above: 6 hours
  • Writing the blog and making the Youtube video: 1 hour

8. Topic page (2)

This blogpost is an addition on the last blogpost. The topic page is separated in two because the time I spend and the things I learned when making the topic page are more than previous steps done before.

Struggles I had while making the topic page

Time and date picker

The first problem I encountered while making this step was the time and date picker on the “add topic” page.

The date and time pickers aren’t displayed as I want them to. The time picker is static and the date picker isn’t visible at all. I eventually managed to get them into a dialog. The result is displayed below.

I reached the result by looking into the different dialogs that are available on the Vuetify website and connect the output from the pickers. Link to the Vuetify website: https://vuetifyjs.com/en/components/time-picker.

Making topic photo’s overview and separate topic photo’s visible

I can’t display the foto’s in the overview and in the “view meetup”.

Eventually I needed to change the v-card-media to v-img. Now the pictures are displayed correctly. I found this solution with help of an experienced web development student within my class. He noticed that the unloaded picture by inspecting and selecting the right element where the component is nested in.

Permission denied

Eventually I managed to find the problem. It was in the settings of not the cloud firestorm of Firebase, but the realtime database (as can be seen below).

The rules needed to be changed in order to grand permission to change things within the database I am using. I found this solution in a post on the internet. A link to the post can be found below.

https://stackoverflow.com/questions/51707898/permission-denied-when-permissions-are-actually-allowed

Further development

Eventually I managed to store the created topics into firebase and load them back to my app. The values I create are the date description, location, image and title. These values will be given the right place when displayed as a topic. Below you can see the values (example) that are stored.

The picture below shows how the data is displayed within the app.

By adding the storage functionality to the topic page, it was lost in the calendar page. This is solved by moving the line of code below. The place it use to be is commented out. the constant db binds the calendar page with Firebase.

Time spend

  • Implementing time and date picker into ‘create a topic’: 3 hours
  • Displaying pictures in the topic overview and highlight page: 2 hours
  • Further watching the same Youtube tutorial playlist as in the last post: 3 hours
  • Implementing Firebase code into my application: –> Finding permission to create new topics and load them: 3 hours , Perfection the front end of the application: 3 hours
  • Making the blogpost: 1,5 hours

Design a site like this with WordPress.com
Get started